
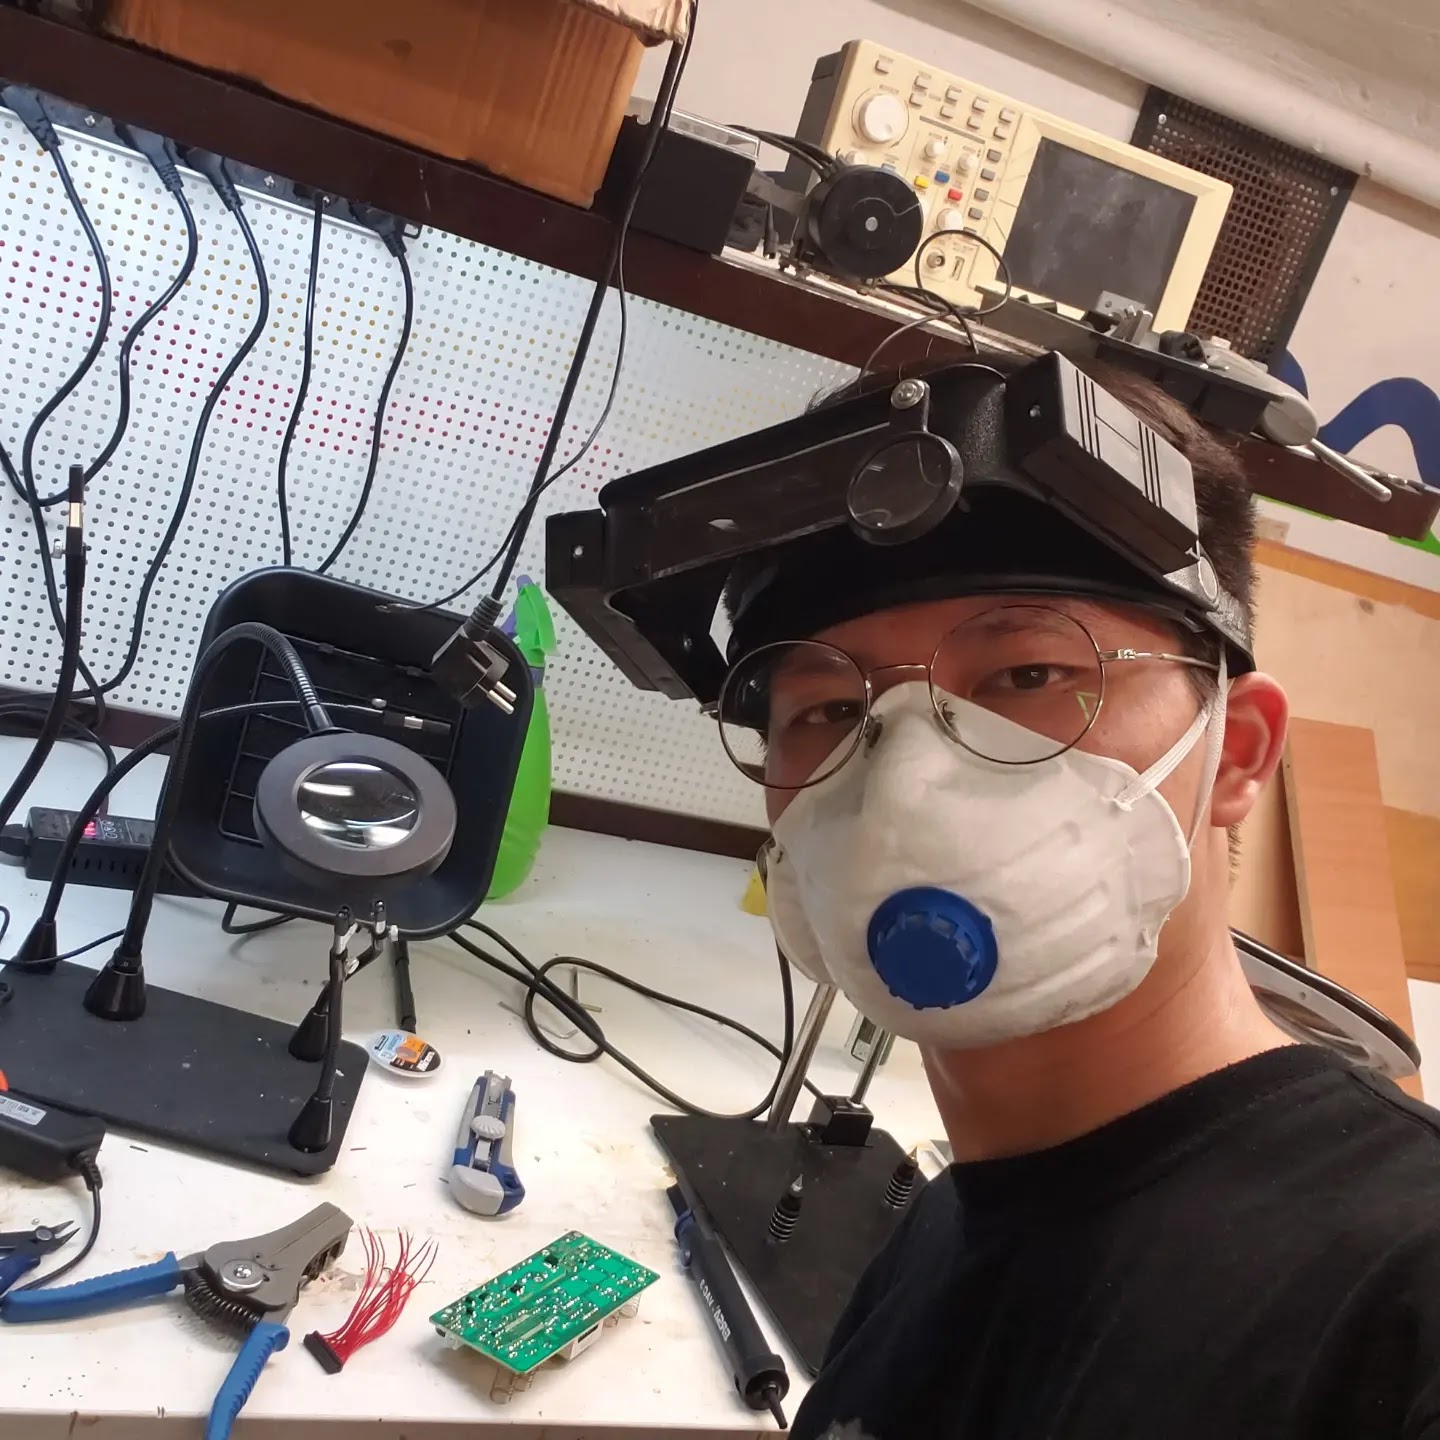
Why have this?
Around the summer of 2022, I bought a Chinese air fryer for a pretty cheap price. At first, it was quite good to use, but about 2 months later, it died, plugged in and didn’t see the indicator light on anymore. I guess it might be because I plugged it in continuously and didn’t unplug it. But the main reason is probably because it sucks ^^.

Brief about the fryer without oil
Talking about the features of this air fryer is also very good (compared to the price). The maximum temperature it can reach is about 200 degrees Celsius. 7 bar led display to show temperature and time. There is a capacitive touch button to be able to set the time and temperature. There are pre-installed profiles, for example, to roast chicken, fish, … will need different temperatures and times. The pot has a capacity of 3.5L inside and 5L outside, very large, so grilling chicken is quite comfortable.

Working principle of oil-free fryer
If we want to fix it, we must first understand its working principle. Instead of using oil to fry food as usual, an oil-free fryer cooks food by using a heating rod combined with a fan to create a flow of hot air in the pot, rapidly circulating throughout the surface of the food and cook it.
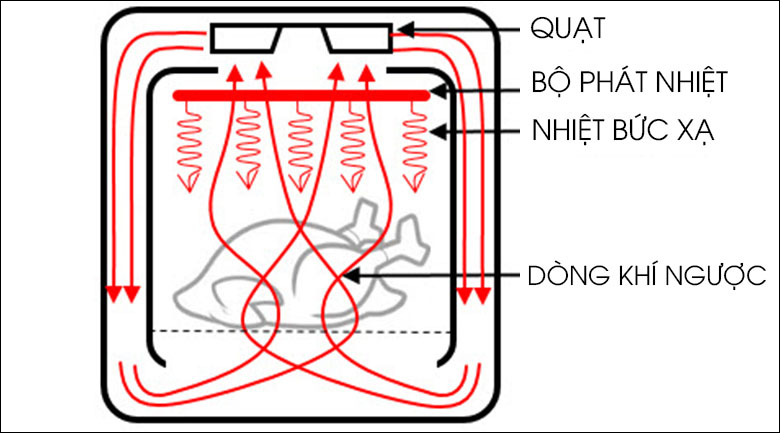 Working principle of oil-free fryer
Then how to fix it?
Just take it off first. To access the control board is quite easy, just need a screwdriver and remove a few screws and you’re done.
 Overview
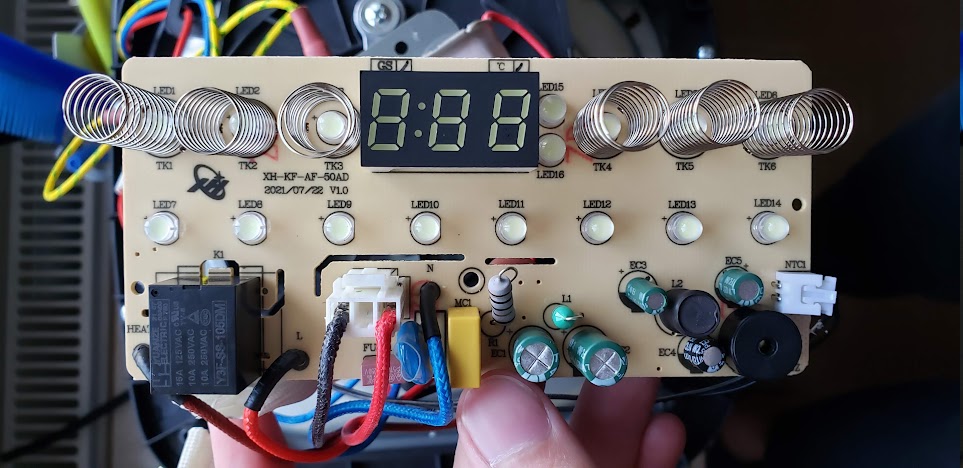 Front panel
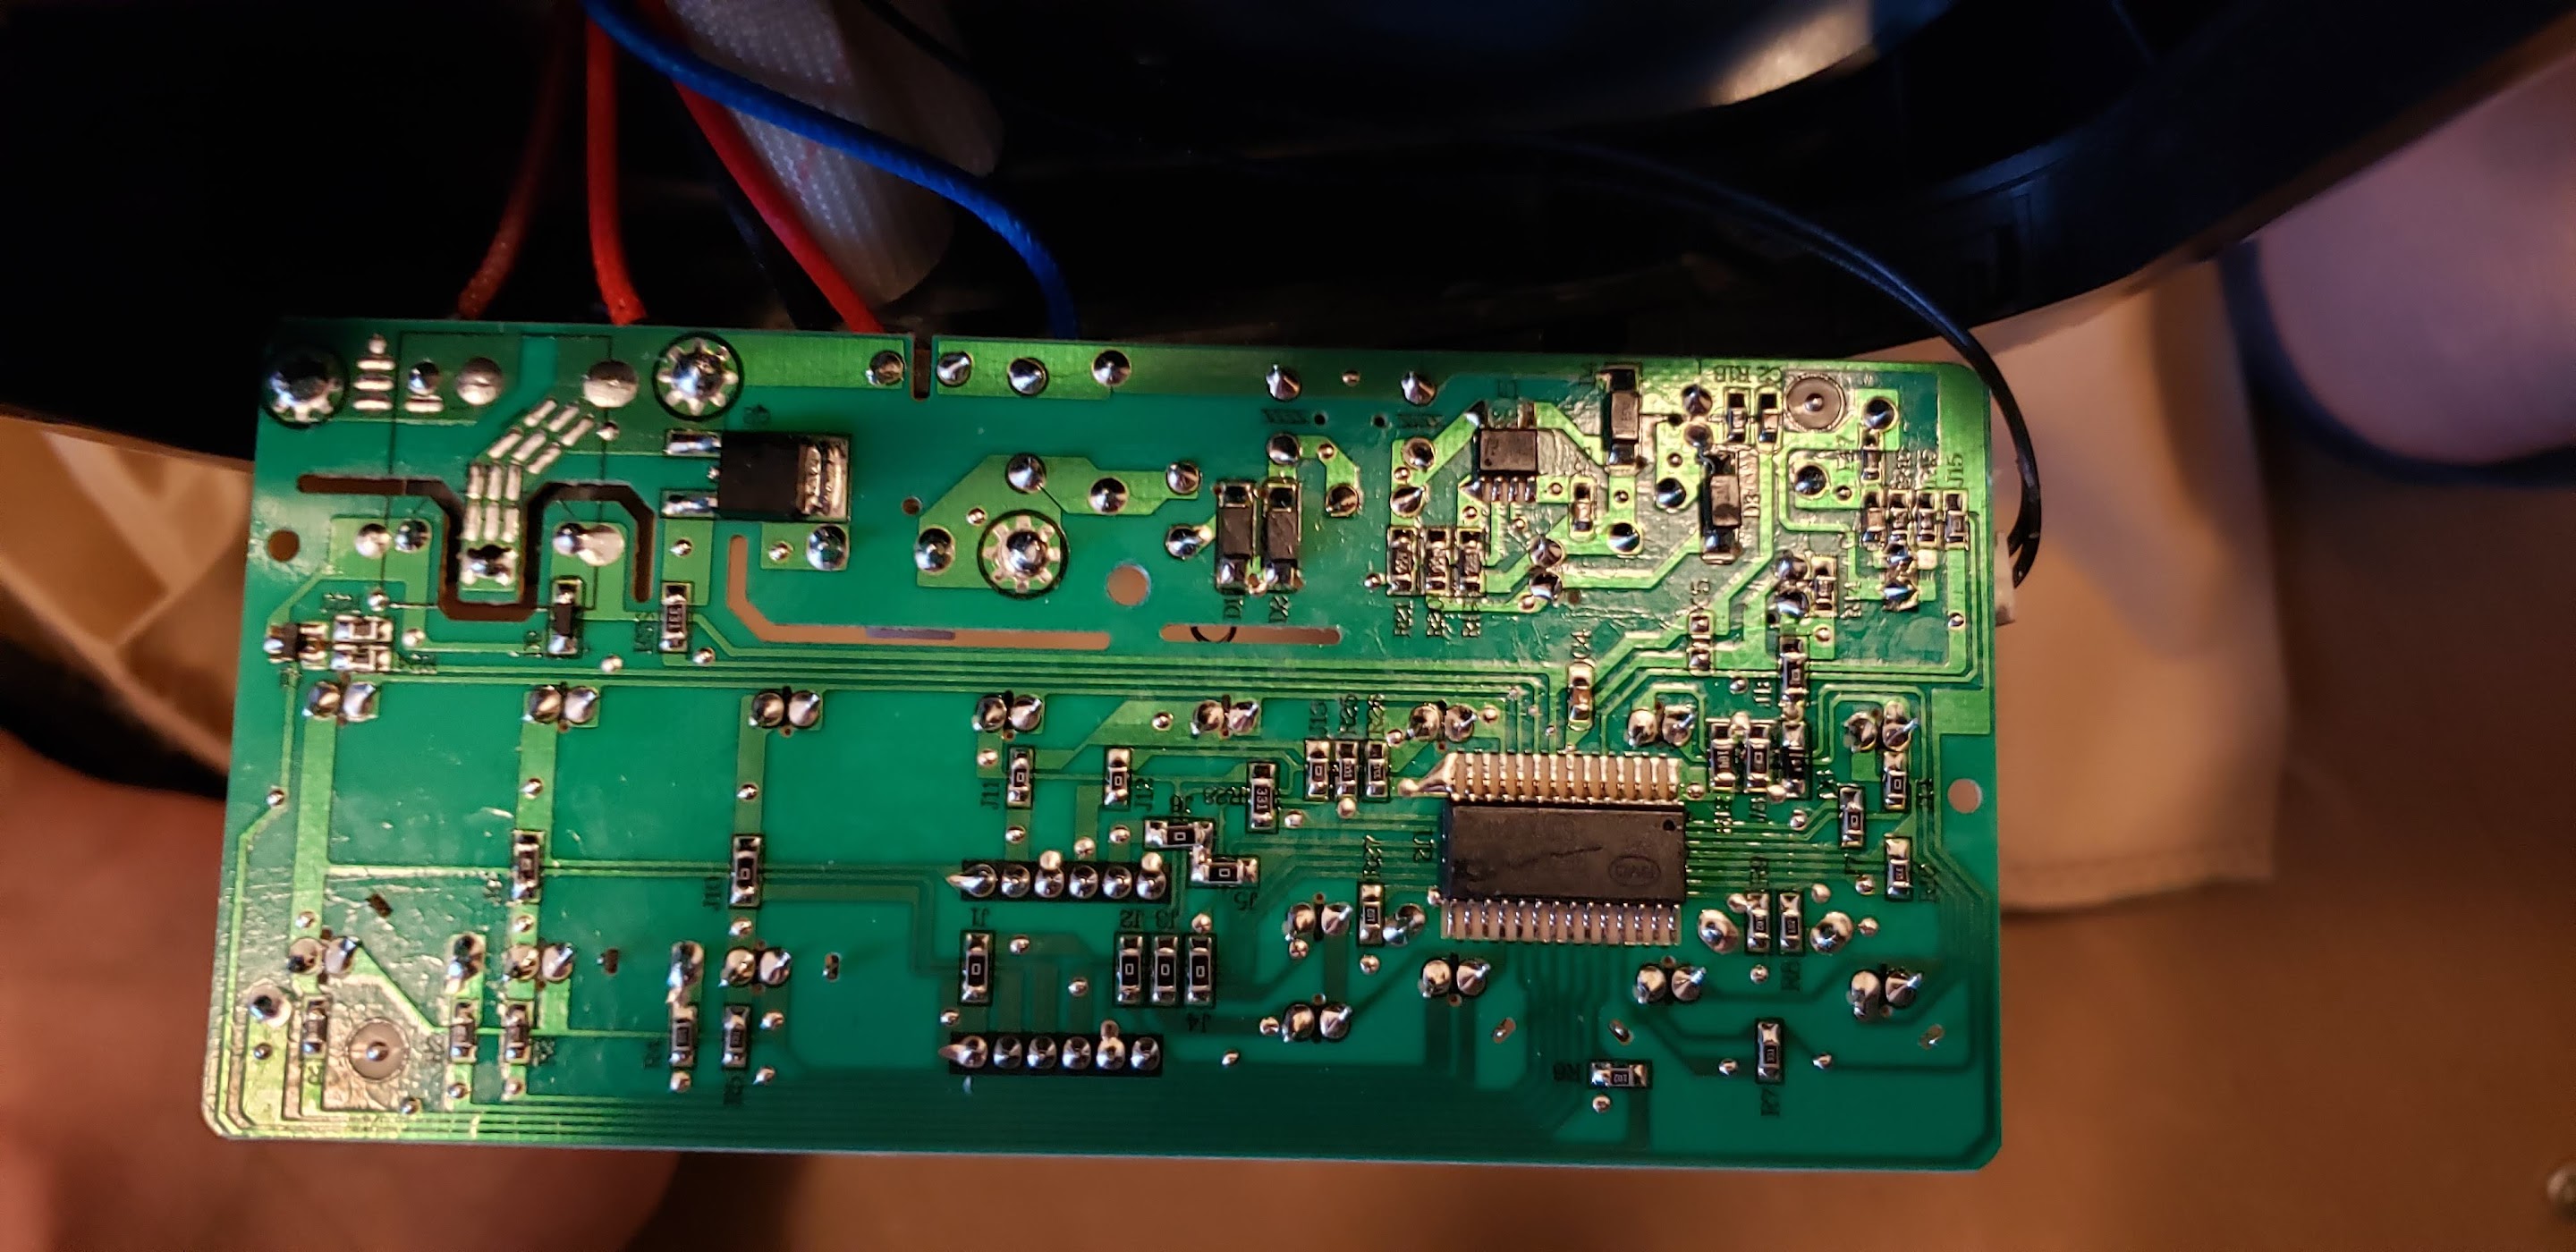 Back panel
After using various operational methods, I have determined that the main component causing the error is the control board. Oops! In this section, I will analyze a bit why it’s bad. If normal components fail, I can buy a new one to replace it, but when the control board fails, replacement is not possible. Because the control board contains the program to control the operation of the fryer. So, even if I can buy a new control board, I don’t have the program to upload into it to make it run. If an unskilled person encounters this problem, they would give up. But I learned electronics, I am an future engineer, so I see this as an opportunity to learn more.
My solution is to program a new microcontroller and replace it with the old one. Fortunately, I bought an ESP32 before, never used it, now it has a job. Briefly talking about this one, this chip in addition to the functions like conventional microcontrollers, it also supports WiFi and Bluetooth. So I plan to add the web control feature via WiFi too ^^.
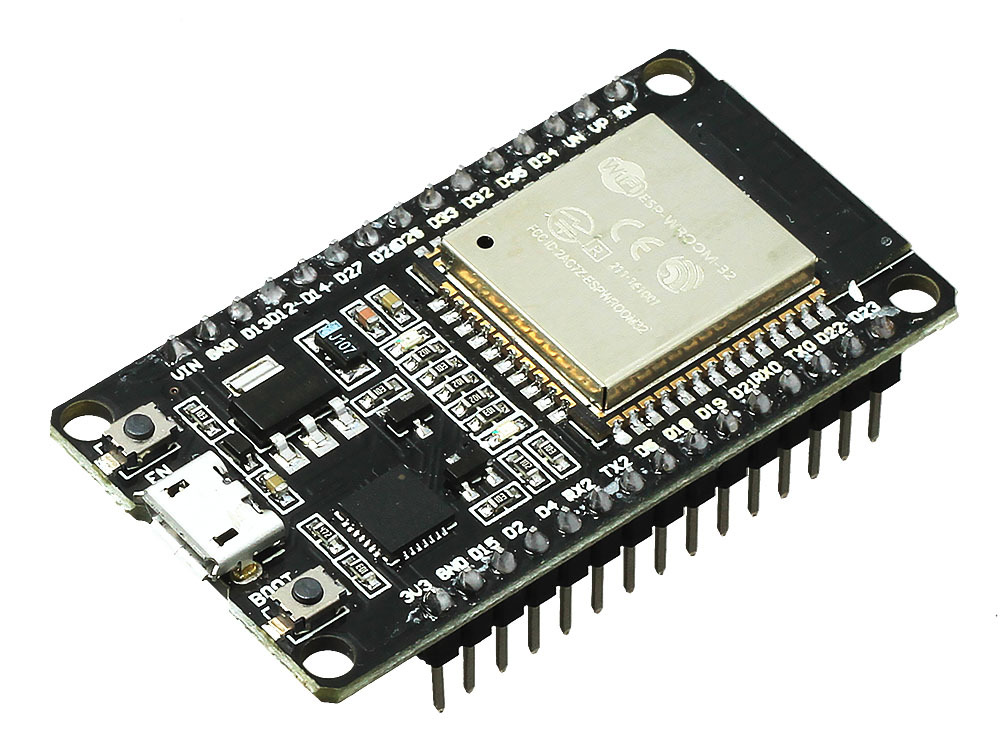 ESP32
ESP32
Let’s start!
First, I will remove the old microcontroller from the board. I don’t have a dedicated torch in this section, so some pins have broken copper pins. But I will try to deal with this part later.
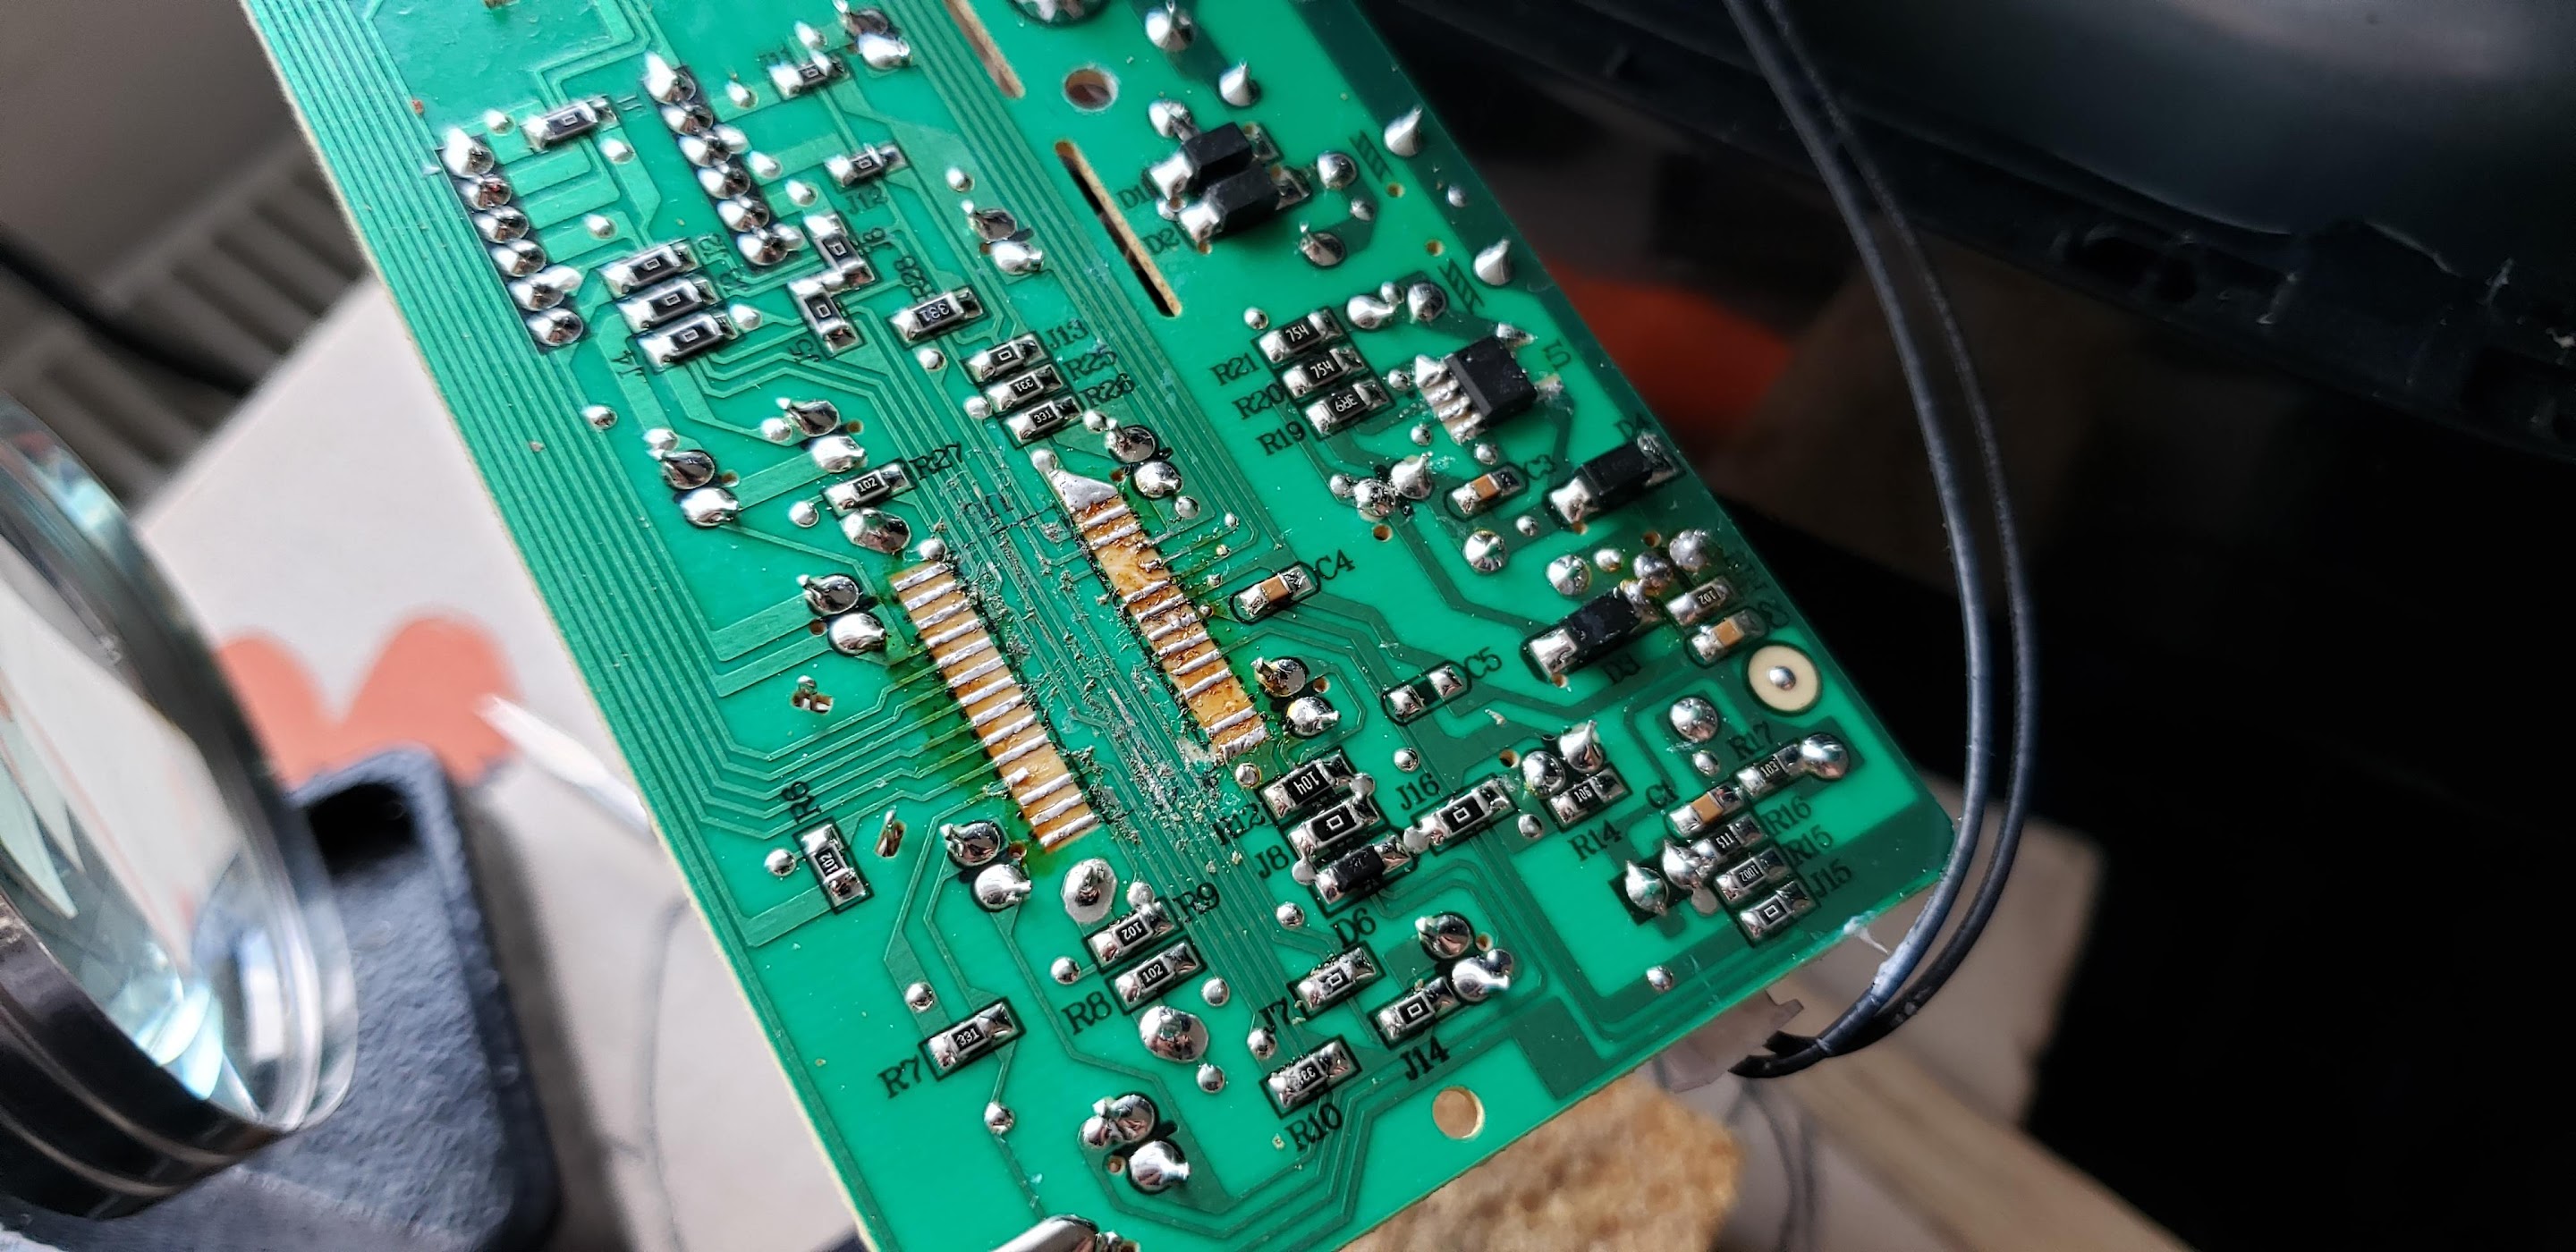 Circuit board after removing the microcontroller
Then solder the wires to the pins of the old microcontroller
And here is the result!
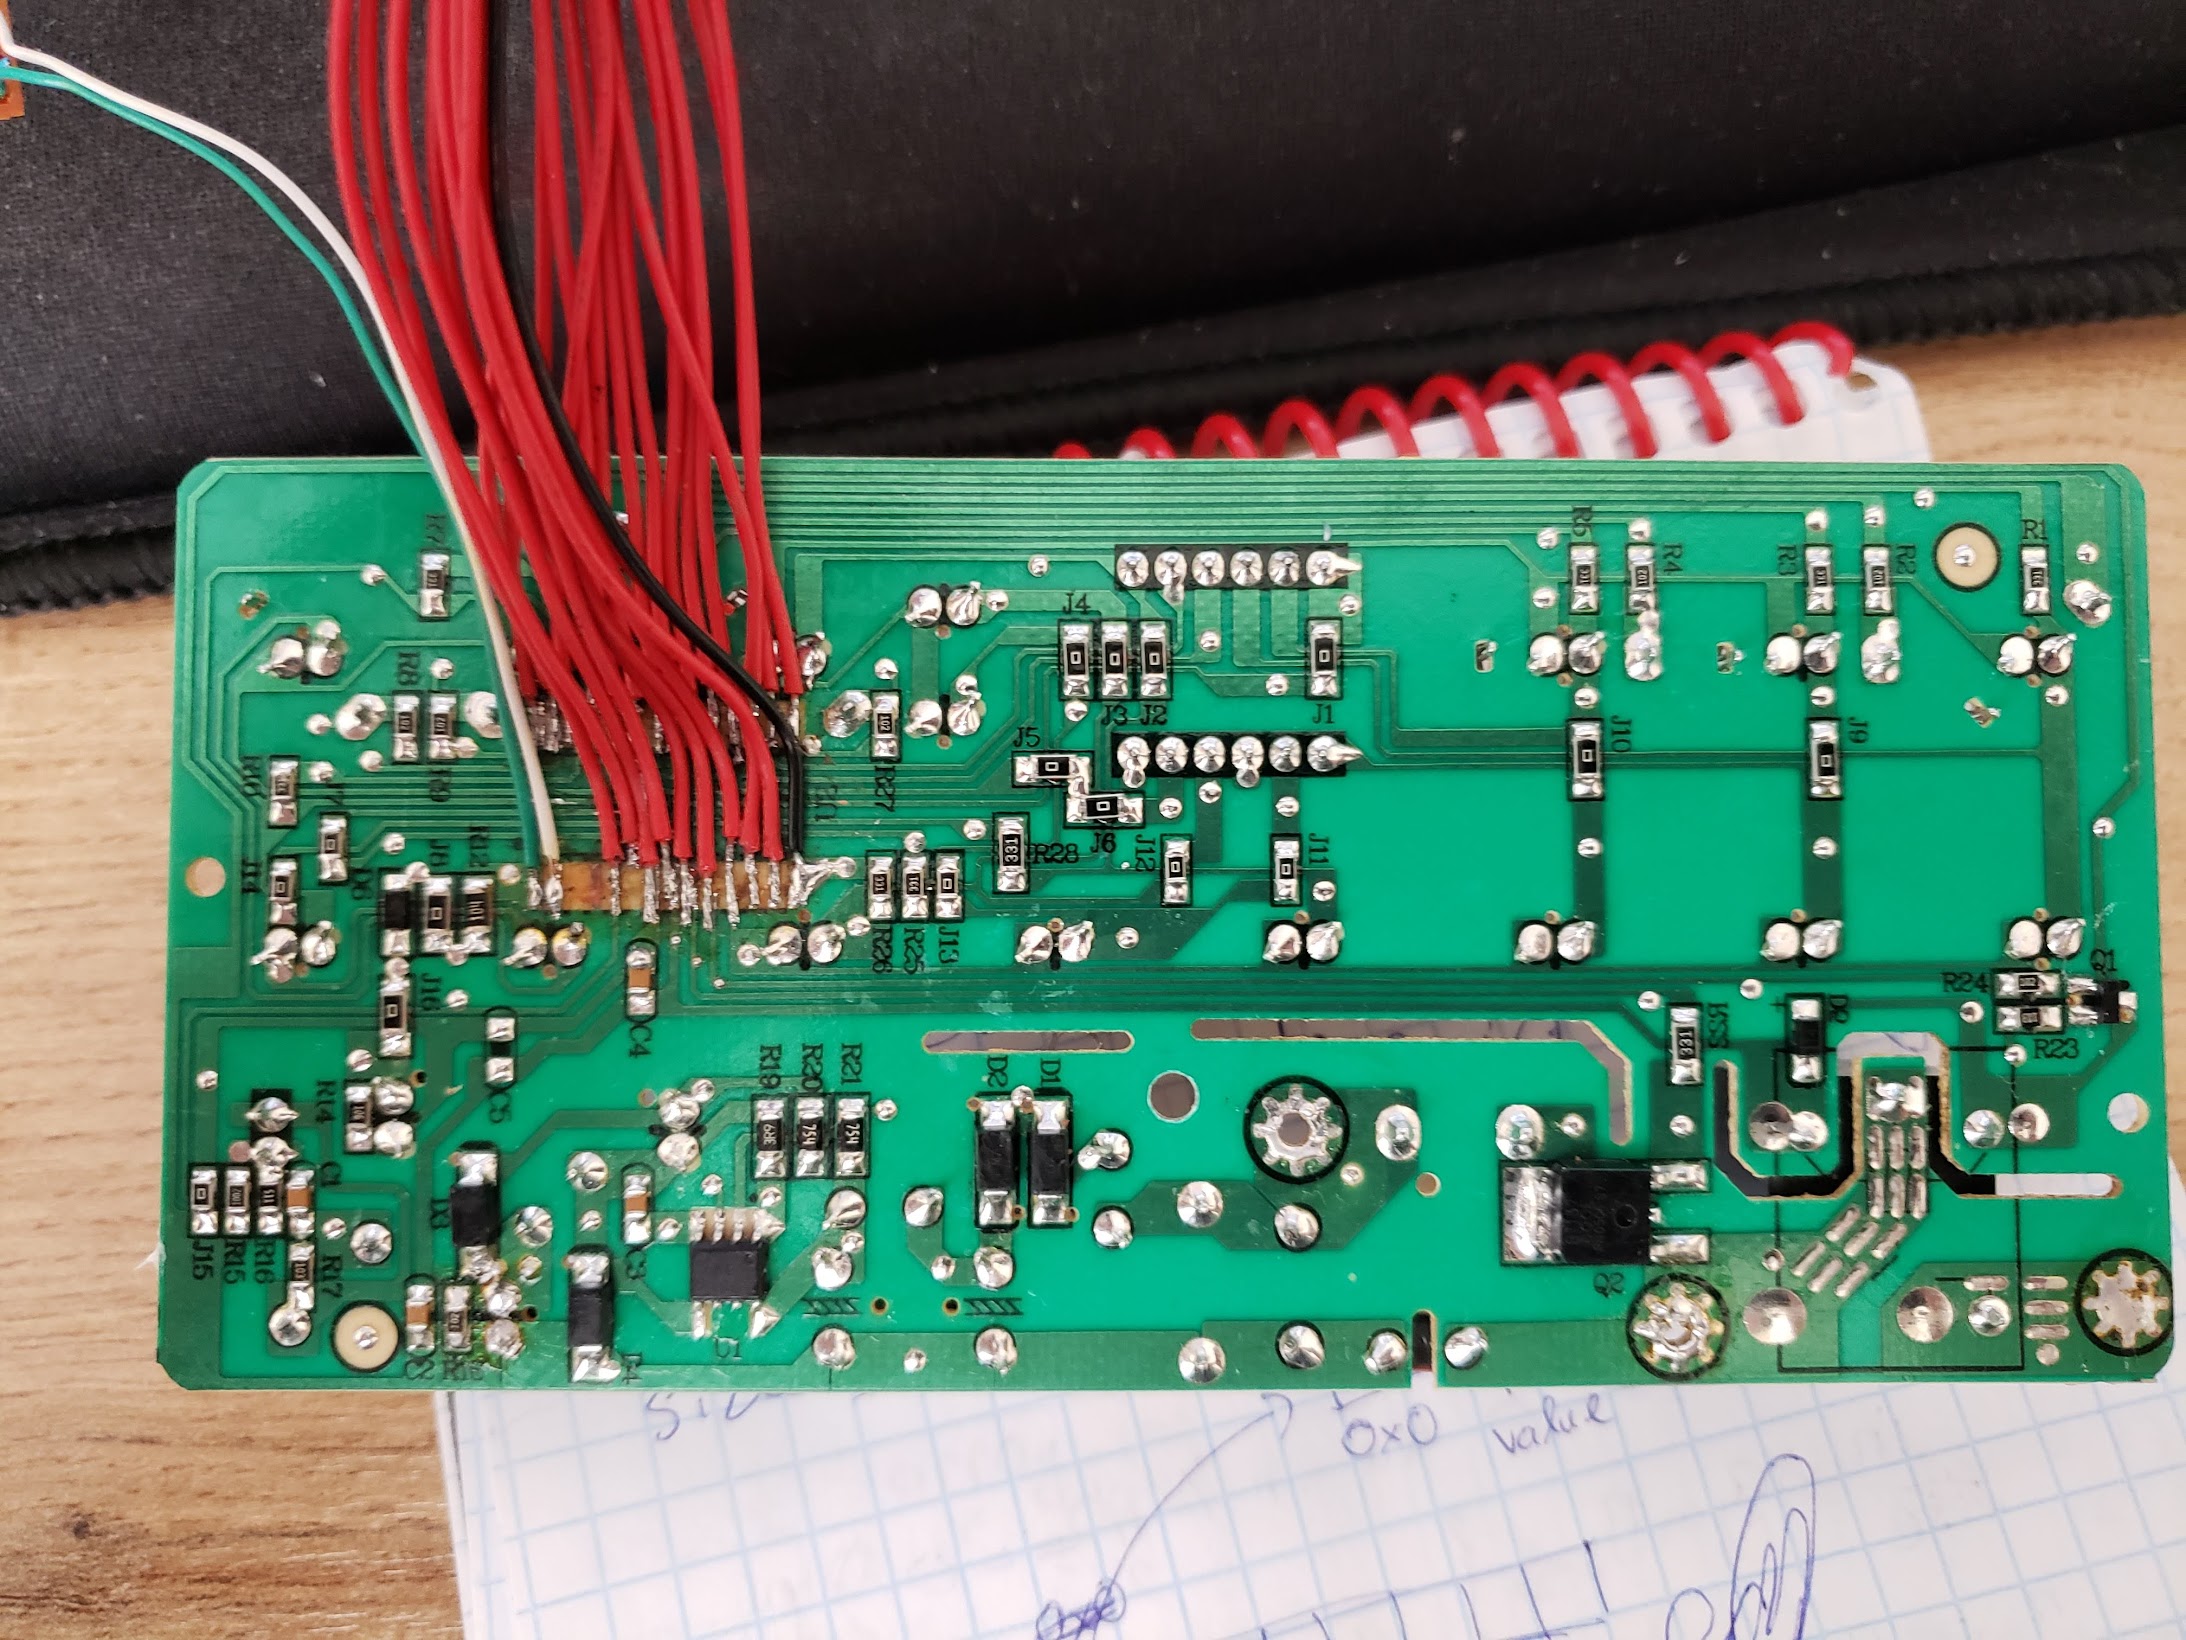 Circuit board after soldering wire
Next, I will proceed to use a multimeter to measure and mark the pins. The purpose is to know which pins are connected to which components on the circuit. Some pins will turn on and off the leds, others are used to turn on the heater, and the pins are connected to the temperature sensor.
 Proceed to mark the pin pins
The next step is to connect the wire to the new controller chip.
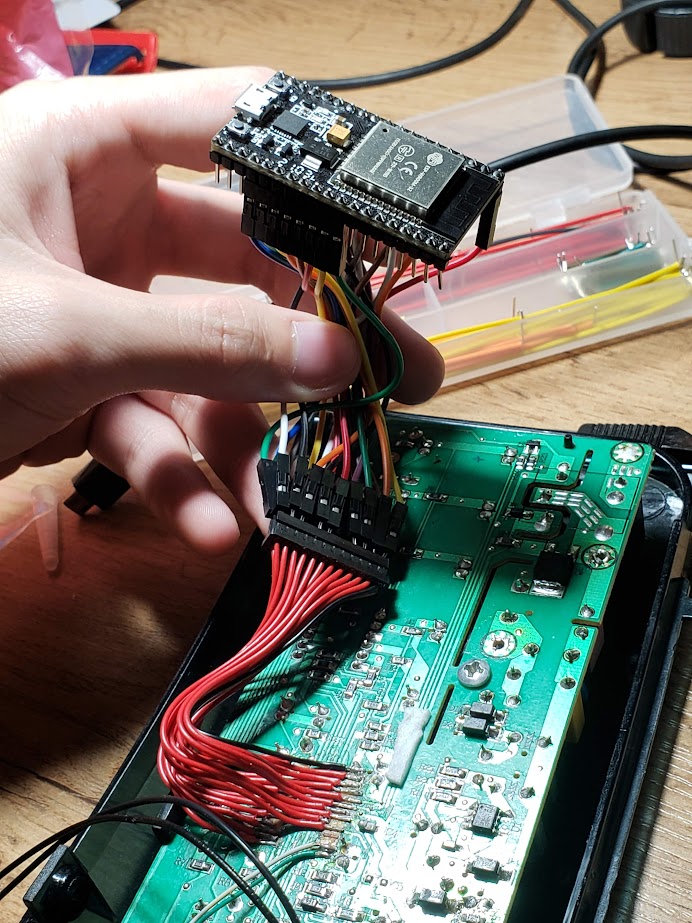 Connect to ESP32
Next is to get familiar with controlling the leds on this circuit board. This control is also not very easy, because the leds are connected in the form of a matrix, so in order to control it, we will have to turn the leds on and off together quickly to deceive the human eye (this is called is multiplexing). But I have a problem that if I increase the scan frequency, my microcontroller cannot respond (I programmed with RTOS, so I got a watchdog triggered error, if anyone knows the solution, please tell me)
I originally planned to make the same old control board, but because of hardware limitations, I had to give up. I switched to controlling the fryer by web.
To make a web, it is mandatory to stick to HTML, CSS, and Javascript. So I decided to spend a whole day learning these things. Plus the online tutorials, this is my result after 2 days. A web interface that selects the temperature, time and status of the air fryer, includes a graph of the measured temperature in the fryer that updates every 2 seconds.
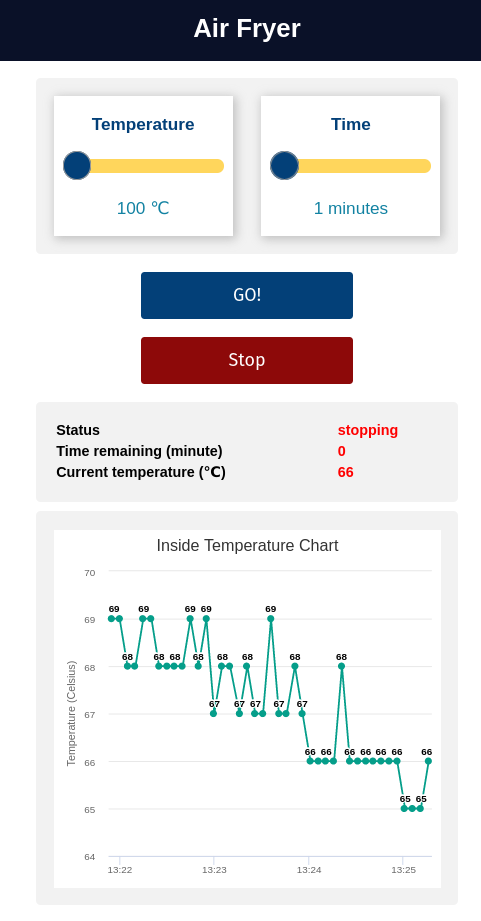 The web interface of the air fryer
But how to connect to the air fryer via phone or computer? I have programmed the microcontroller to become a Wifi connection point. When the phone connects to this Wifi point, it is possible to open the console and interact with it.
Below is a demo video of the fryer in action.
Source code
Here is the link to the repository containing the code of the air fryer.
Conclude
Through the process of doing this project, I had the opportunity to apply the knowledge that I previously learned into practice.
- Learn more HTML, CSS, Javascript (DOM).
- Review knowledge about C. Learn how to design systems. Here is the State Machine Design Pattern.
- Know the difficulties in programming 7-segment led.
In short, I have converted a normal button interface fryer into a web interface. Although it is not very practical when every time I turn the food, I have to pick up the phone to press the button for it to run. But if you can fix it yourself, it’s fun ^^.
Future updates…
If you are a general reader then this part is not for you ^^.
Add cache feature
Because I have a fairly heavy javascript file to serve the plot graph, every time I refresh the page, the ESP32 has to send this data back to the client. Causes an overload for the ESP. To solve this problem, I added the cache feature. So when the user first downloads the web, the resource files will be saved and used for the next time. As a result, the page loads faster.
Below is a comparison between cached and uncached. As you can see the page load was 4-5 times faster.
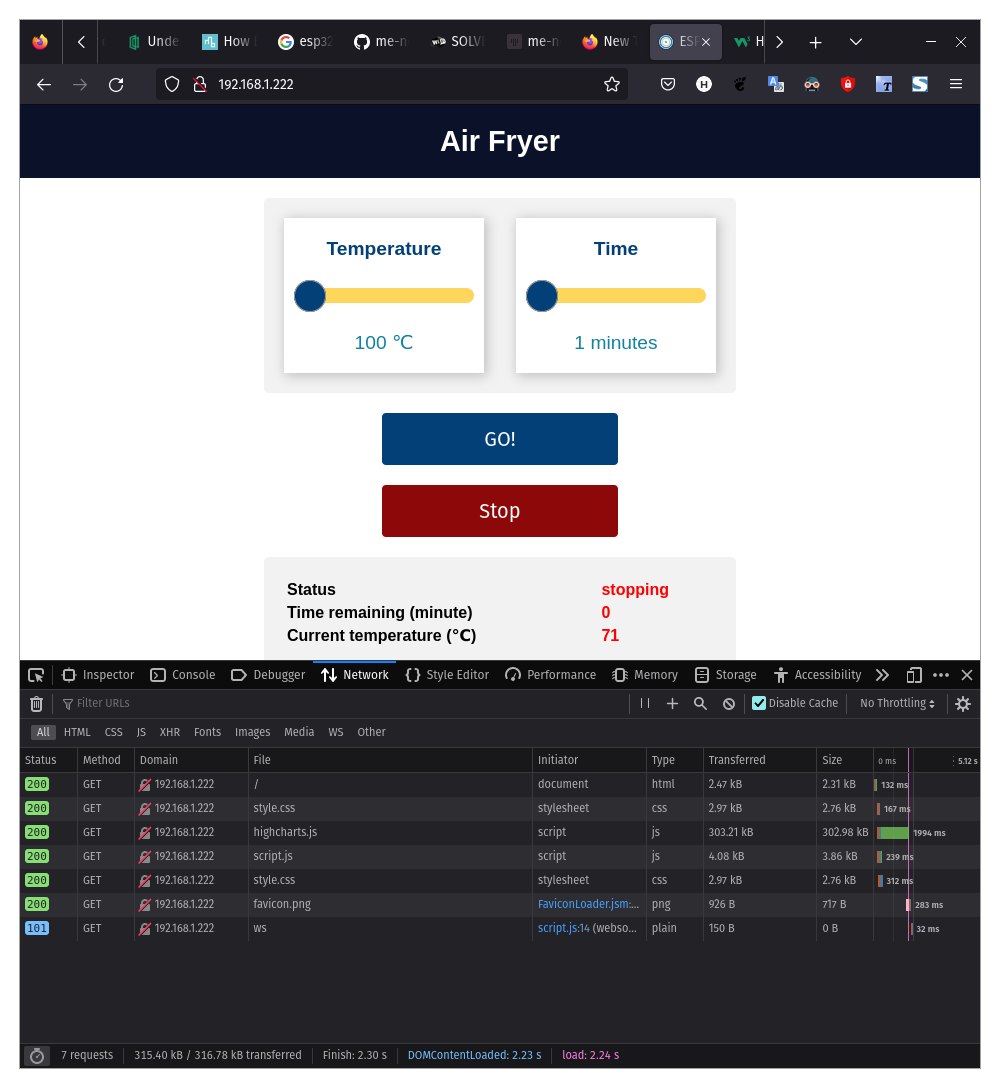 No cache. Loading time is 2.3s
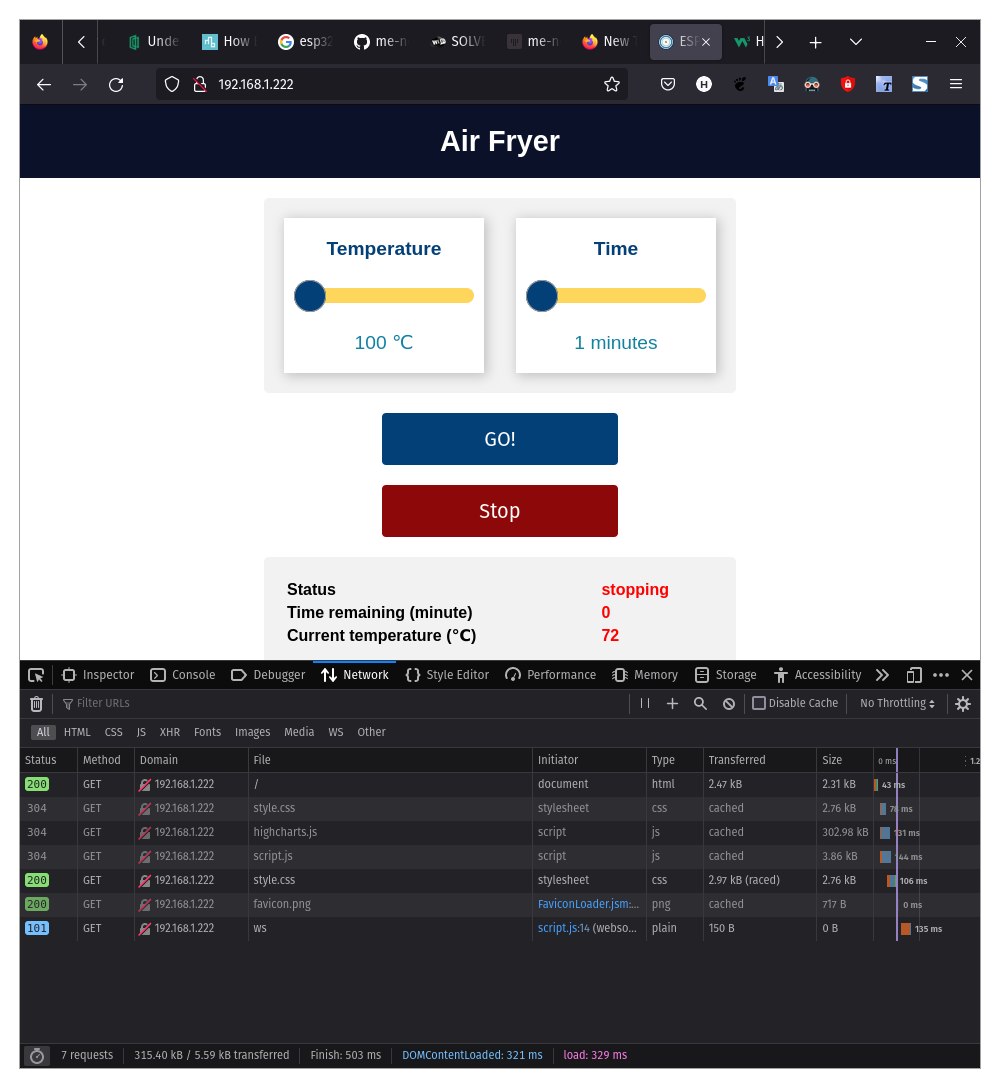 Have cache. Loading time is 0.5s
Add OTA feature
After finishing, I installed the circuit in the case, so if I want to update more features and have to reload the code, I have to disassemble the air fryer to access the circuit. But that was quite laborious, so after researching, I found the solution that is to load the code through the OTA (Over the Air) method. With this method, every time I load the code, I don’t have to disassemble the circuit anymore. I follow this tutorial, if you are interested, please check it out.